
Fall In Love
Tutorial below

Tutorial
Hints:
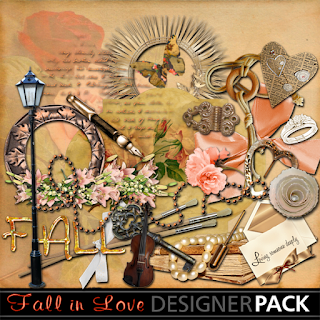
1. All elements should be copied and pasted as new image before using in your tag, to preserve original copies, and delete original from psp work area..
2. I am using Paint Shop Pro Ultimate 2018. If you are proficient in PSP, any version will work.
3. Drop Shadow Settings: Black, opacity 100, Blur 5, Horizontal 1, Vertical 2.
4. Resizing should be done using percentage settings only.
Let's Get Started
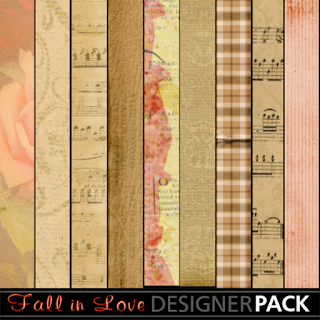
1. Open a new image size 600 x 600, 72 dpi, tick the transparent box. Open paper of choice, I used paper 1. Get the magic wand tool and click inside the blank tag. Copy and paste your paper "into selection" > selections>select none. Open mask of choice. I used Gem Mask # 189. Click on the mask >Layers> New Mask Layer> From Image. Copy and paste the mask onto your background, now known as "tag". Layers> Merge visible.
2. Open letter mask from kit elements. Resize to 27%. Copy and paste "as new layer" onto tag. Layers>Merge visible.
3. Open petal scatters. Resize to 80% twice. Copy and paste onto the right side of the tag "as new selection". Selections> select none.
4. Open Copper chain from elements in kit. Resize to 60%. Copy and paste onto tag "as new selection" so that the lowest part of the chain is four squares from the bottom of the tag and chain is centered. Effects> 3D effects> drop shadow. Selections> select none.
5. Open brushes from elements in kit. Resize to 40%. Image> rotate left. Image> mirror. If your settings ask if you want to mirror horizontal or vertical, choose Horizontal. Copy and paste brushes onto the right side of the tag. Tip of the longest brush should be one block from top of tag, and farthest right brush should also be one block off the right side of the tag. Effects>3D effects>drop shadow. Selections> select none.
6. Open paper of choice for your frame background. I used paper 3. Resize to 18%. Get the selection tool, setting "circle". In center of paper, pull out a circle about the size of a 50 cent piece. Copy, paste as a new image. Choose an image or picture of choice. Thank you to my friend Stephanie for allowing me to use her picture. Remove background from any picture you choose. If using a tube, skip this step. With the selection tool, again, pull out a circle on your photo. Copy> paste as new selection onto your circle paper that will become your background for your frame. Selections>select none.
7. Open frame # 2. Resize to 55%. Open a new image 600 x 600, transparent. Copy and paste your circle/photo onto the transparent image "as new layer". Layers> Merge visible. Copy and paste the frame over the circle with your photo "as new layer". Layers> merge visible. Copy and paste frame onto the tag "as new selection" and position as shown. Effects> 3D effects> Drop shadow. Selections>select none.
8. Open heart pin from elements in kit. Resize to 15%. Copy and paste onto tag over flowers on frame as shown, "as new selection". Effects> 3D effects> Drop shadow. Selections>select none.
9 . Open peach colored leaves from elements in kit. Resize to 5%. Sharpen. Copy and paste leaves onto right side of tag "as new selection" Effects> 3D effects> Drop shadow. Selections>select none.
10. Open butterfly from elements in kit. Resize to 10%. Sharpen. Image>free rotate> left 15 degrees. Copy and paste onto tag so that the highest point of butterfly wing is three blocks from the top of tag and the left wing tip is four blocks from the left side of the tag. Effects> 3D effects> Drop shadow. Selections>select none.
11. Open diary/journal from elements in kit. Resize to 20% Copy and paste onto the tag "as new selection" at bottom of flowers as shown. Effects> 3D effects> Drop shadow. Selections>select none.
12. Open fountain pen from elements in kit. Resize to 15%. Image > free rotate> right 30%. Copy and paste pen onto tag over the journal as shown. Effects> 3D effects> Drop shadow. Selections>select none.
13. Signature, I used font "The NautiGal". Use color settings of your preference. Set signature on tag to your preference and merge text layer visible. Be sure to credit any artist for their tubes you might use and add licensing per their terms of use.
Thank you for trying my tutorial. Do not claim as your own. Do not copy, paste or link to ANY website. Please only link my blog and name of tutorial. This tutorial was created solely by me on September 22, 2018. Any resemblance to any other tutorial is purely coincidental.
No comments:
Post a Comment